On this page
- Start with an action and an expected result
- Save and inspect the task detail
- Change the status when the stage changes
- Add the context behind the status
- Check the result before moving on
- Video transcript
- Start a project task
- Name the follow-up clearly
- Describe what the follow-up needs
- Save the task and inspect its detail page
- Move the sample task into progress
- Write a useful progress comment
- Save the update
- Review the saved progress context
- Try a clear follow-up in your own workflow
A useful task names the follow-up, the expected result, and the next check. Its status gives a quick signal; a progress comment explains the context.
This walkthrough creates a sample delivery-window task, moves it from Initiated to In Progress, and saves an update in one local sample project.
Recorded in a local instance of the actual os.construction app using the seeded Sandbox Test Project. The task and progress update are invented sample data. No assignees or distribution members are selected in this example.
Watch this walkthrough on YouTube.
Start with an action and an expected result
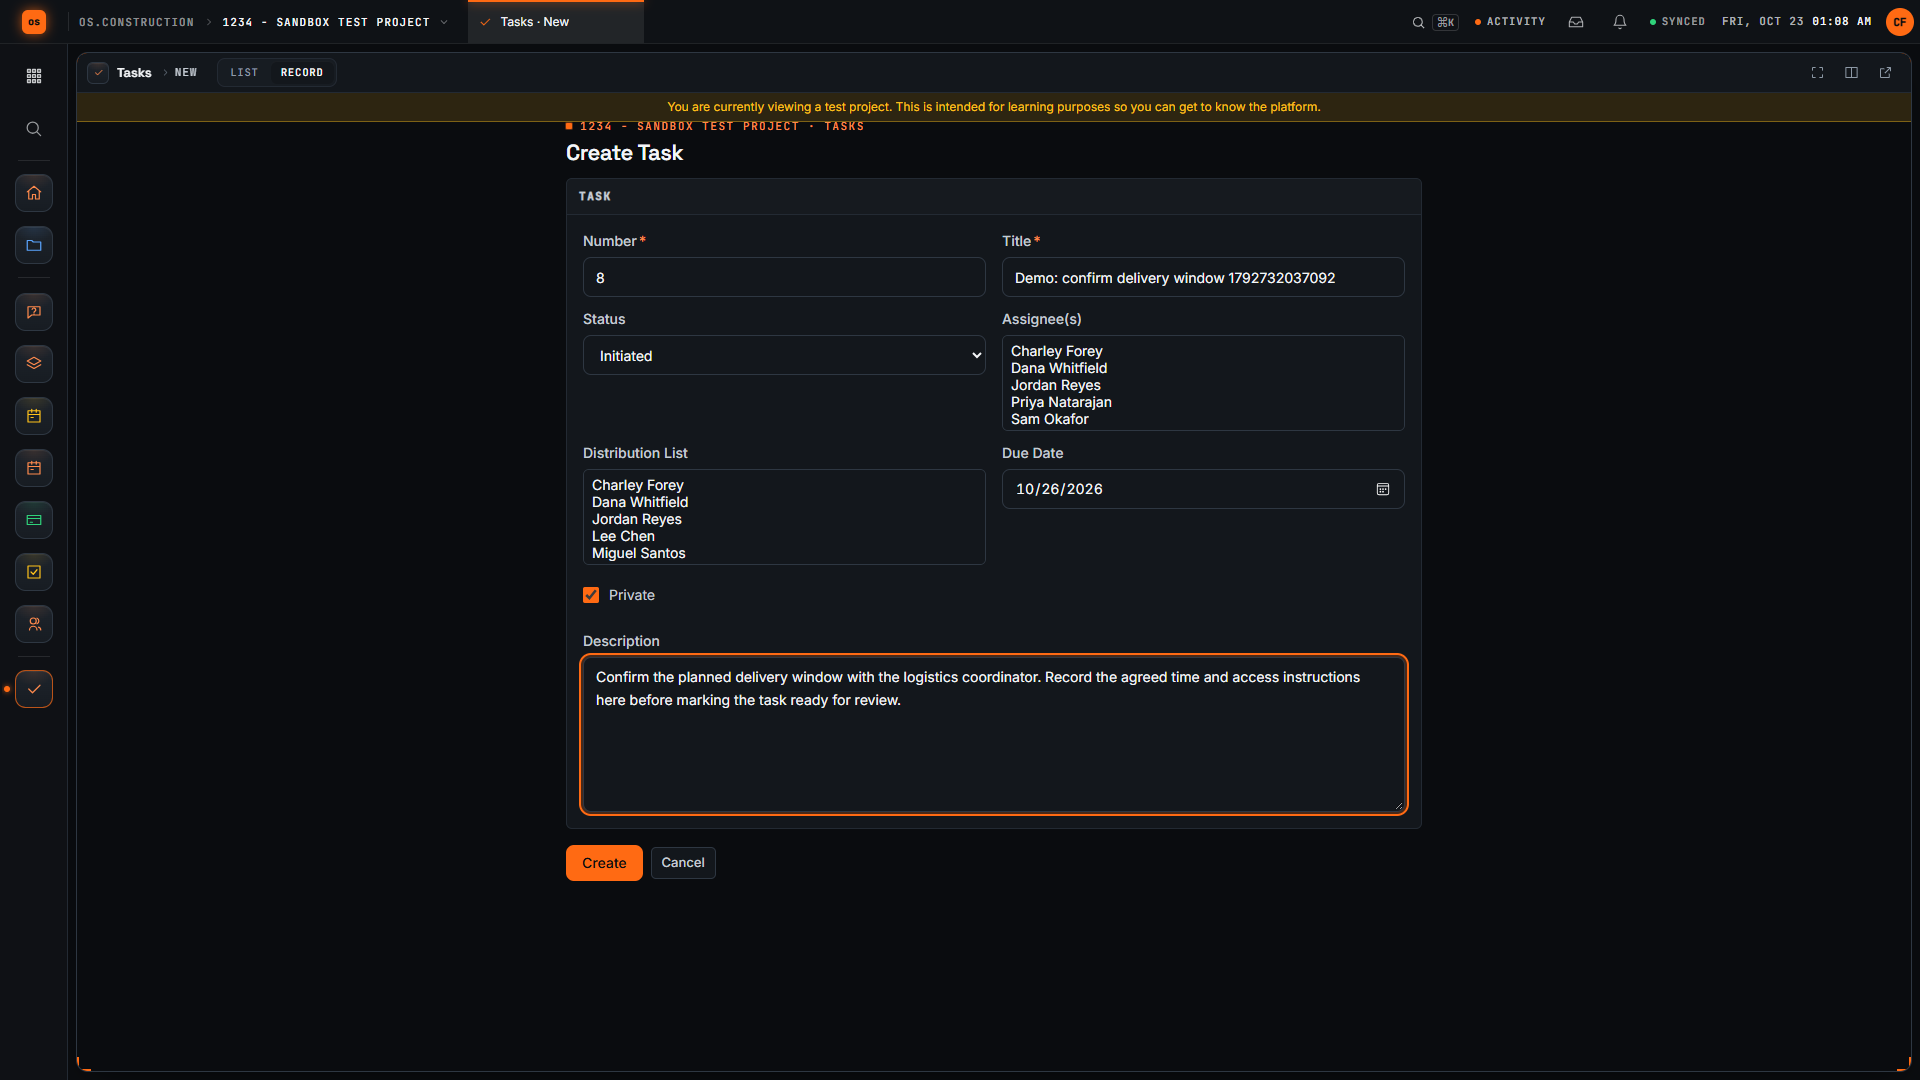
Open Create Task in your project’s Tasks tool. Confirm the project before entering the follow-up.
Use a title that names the action. The example uses Confirm delivery window, with a unique demo reference to distinguish repeated recordings.
Use Description to explain what a useful result would contain. The sample says:
Confirm the planned delivery window with the logistics coordinator. Record the agreed time and access instructions here before marking the task ready for review.
Adapt the description to your actual follow-up and the information its reviewer will need.
| Field | What it should help the reader understand | Sample content |
|---|---|---|
| Title | The action that needs attention | Confirm delivery window |
| Description | What the expected result should contain | Agreed time and access instructions |
| Status | The current stage of the follow-up | In Progress |
| Comment | The next check or new information | Check with the logistics coordinator |
Review the other fields before saving. The example keeps the supplied number and due date, Private selected, and assignees and distribution empty. Choose people, dates, and visibility for your team’s process. Assignment and notices are outside this recording.
Save and inspect the task detail
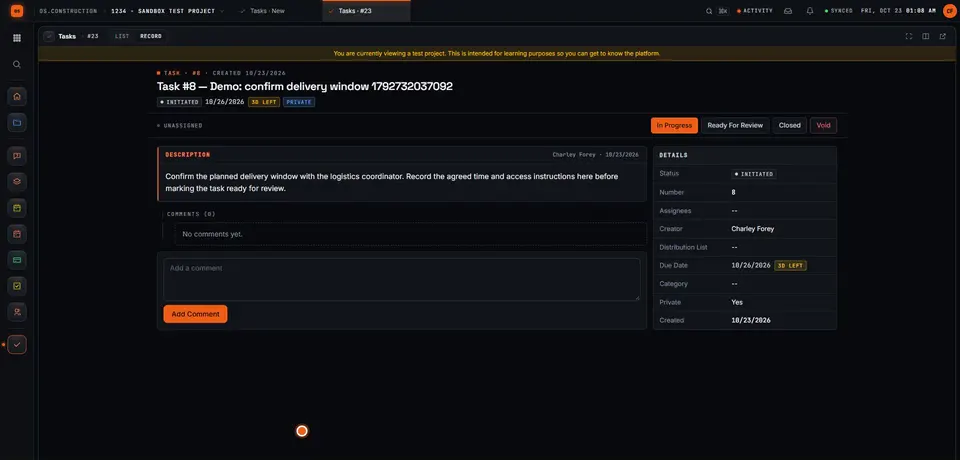
Select Create and wait for the task detail page. Check its title and saved Description.
Check the task number and current status. The example begins in Initiated, with the follow-up and expected result together on one record.
Change the status when the stage changes
Select In Progress for the sample task. After the update, confirm In Progress in the task’s current status badge.
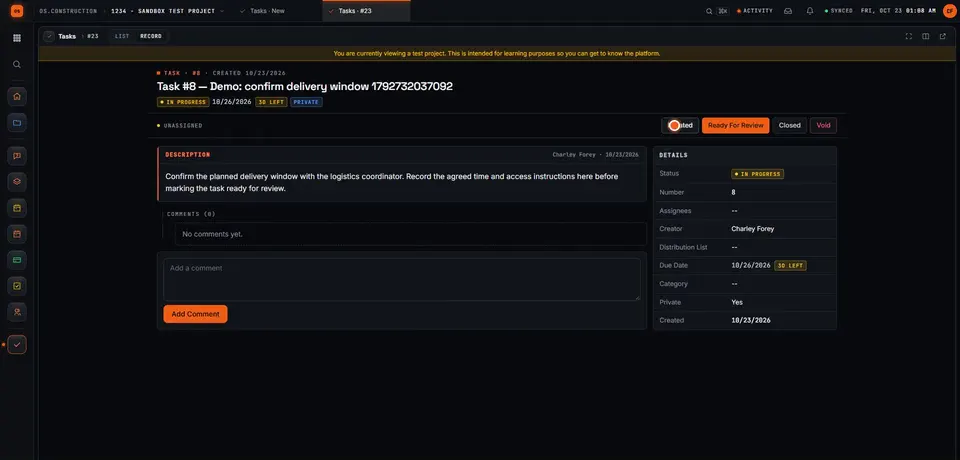
Read the current status badge to confirm the change. The button offers an action. In Progress records the task’s stage; the delivery time still needs confirmation.
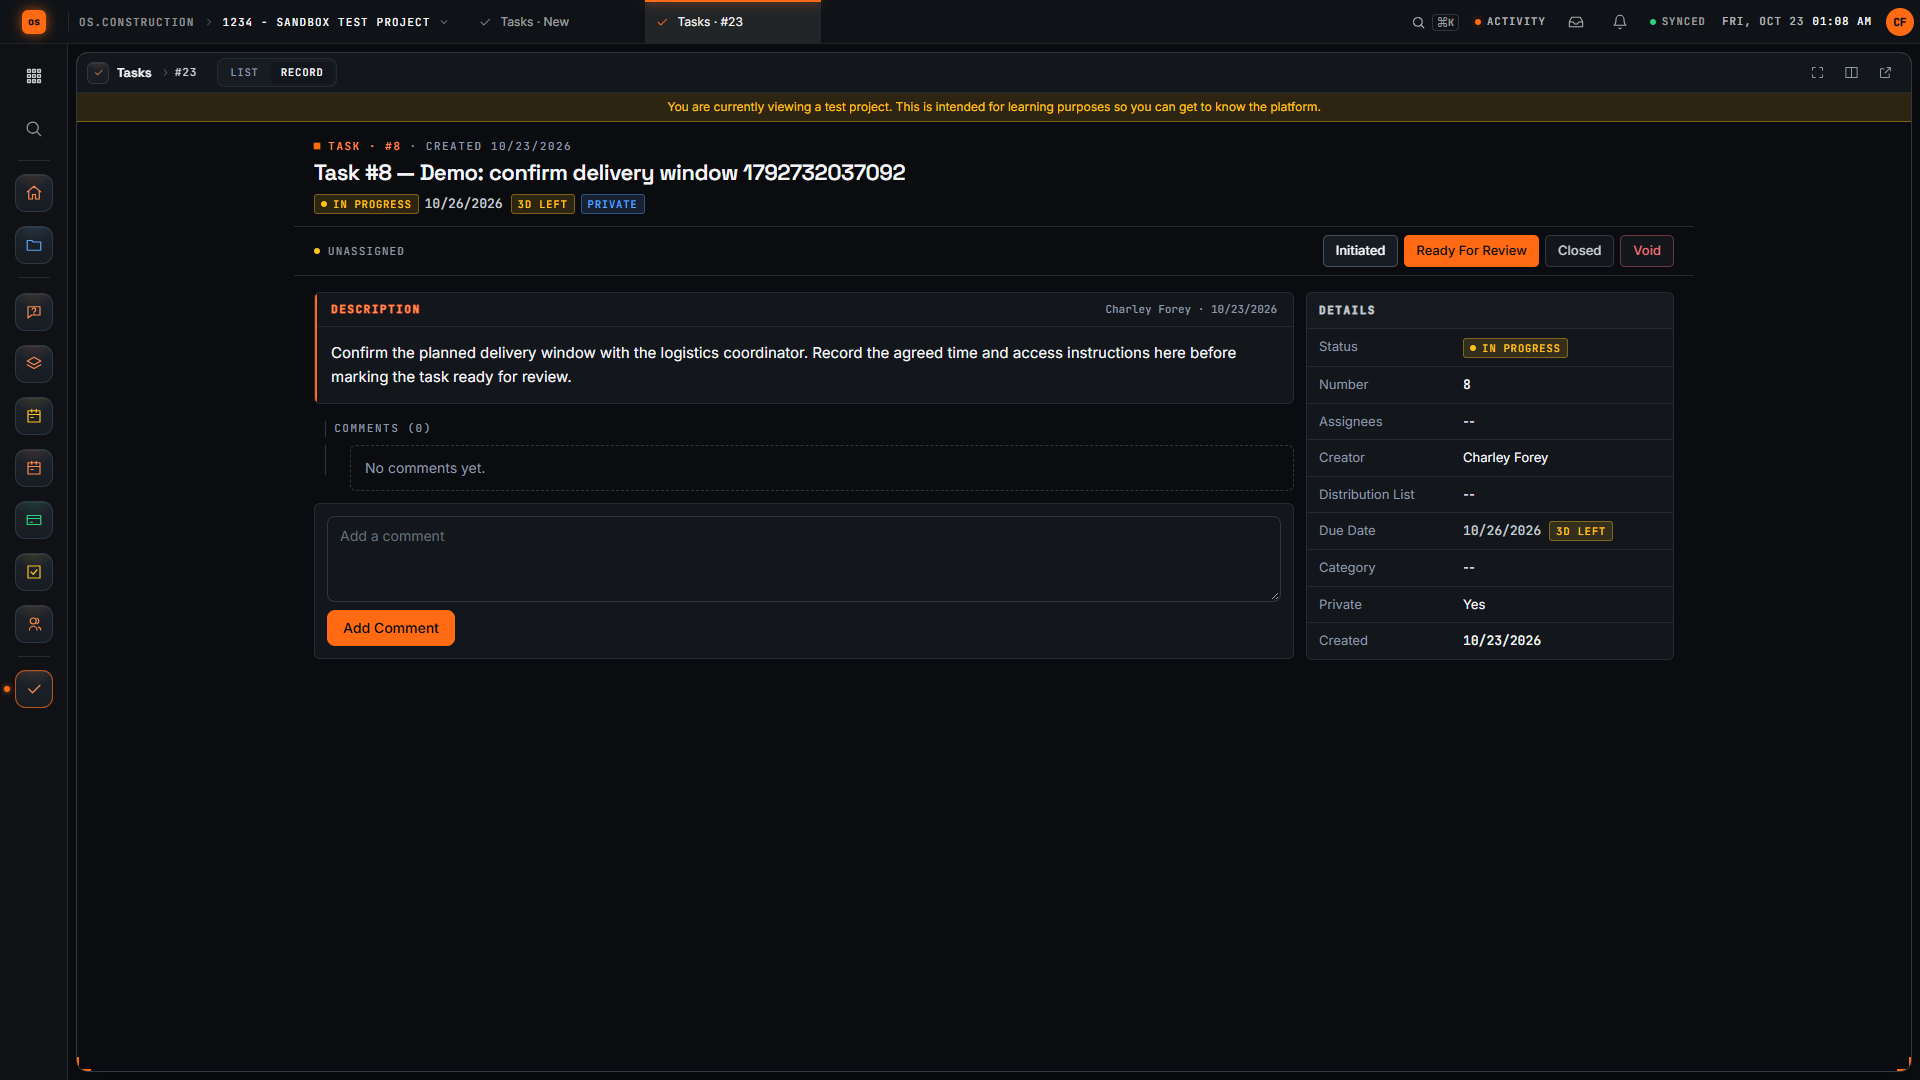
- In Progress in the header badge is the current status.
- The status buttons. In Progress is no longer offered; Ready For Review is highlighted as the usual next step.
- Status in Details shows the same current status.
Add the context behind the status
In the comment field, give the next reader useful context. The invented update says:
Delivery window needs confirmation. Next check: logistics coordinator before the planned drop.
Select Add Comment, wait for the saved text, and read it again. Separate what is known from what still needs checking.
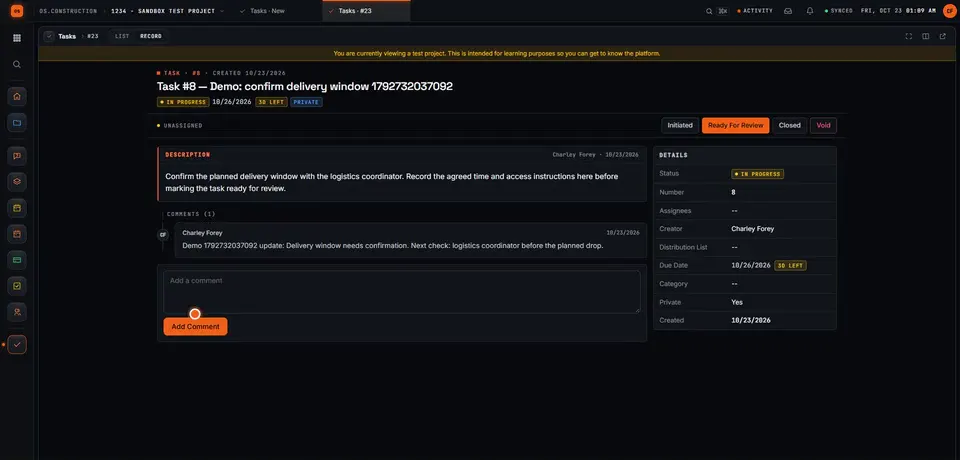
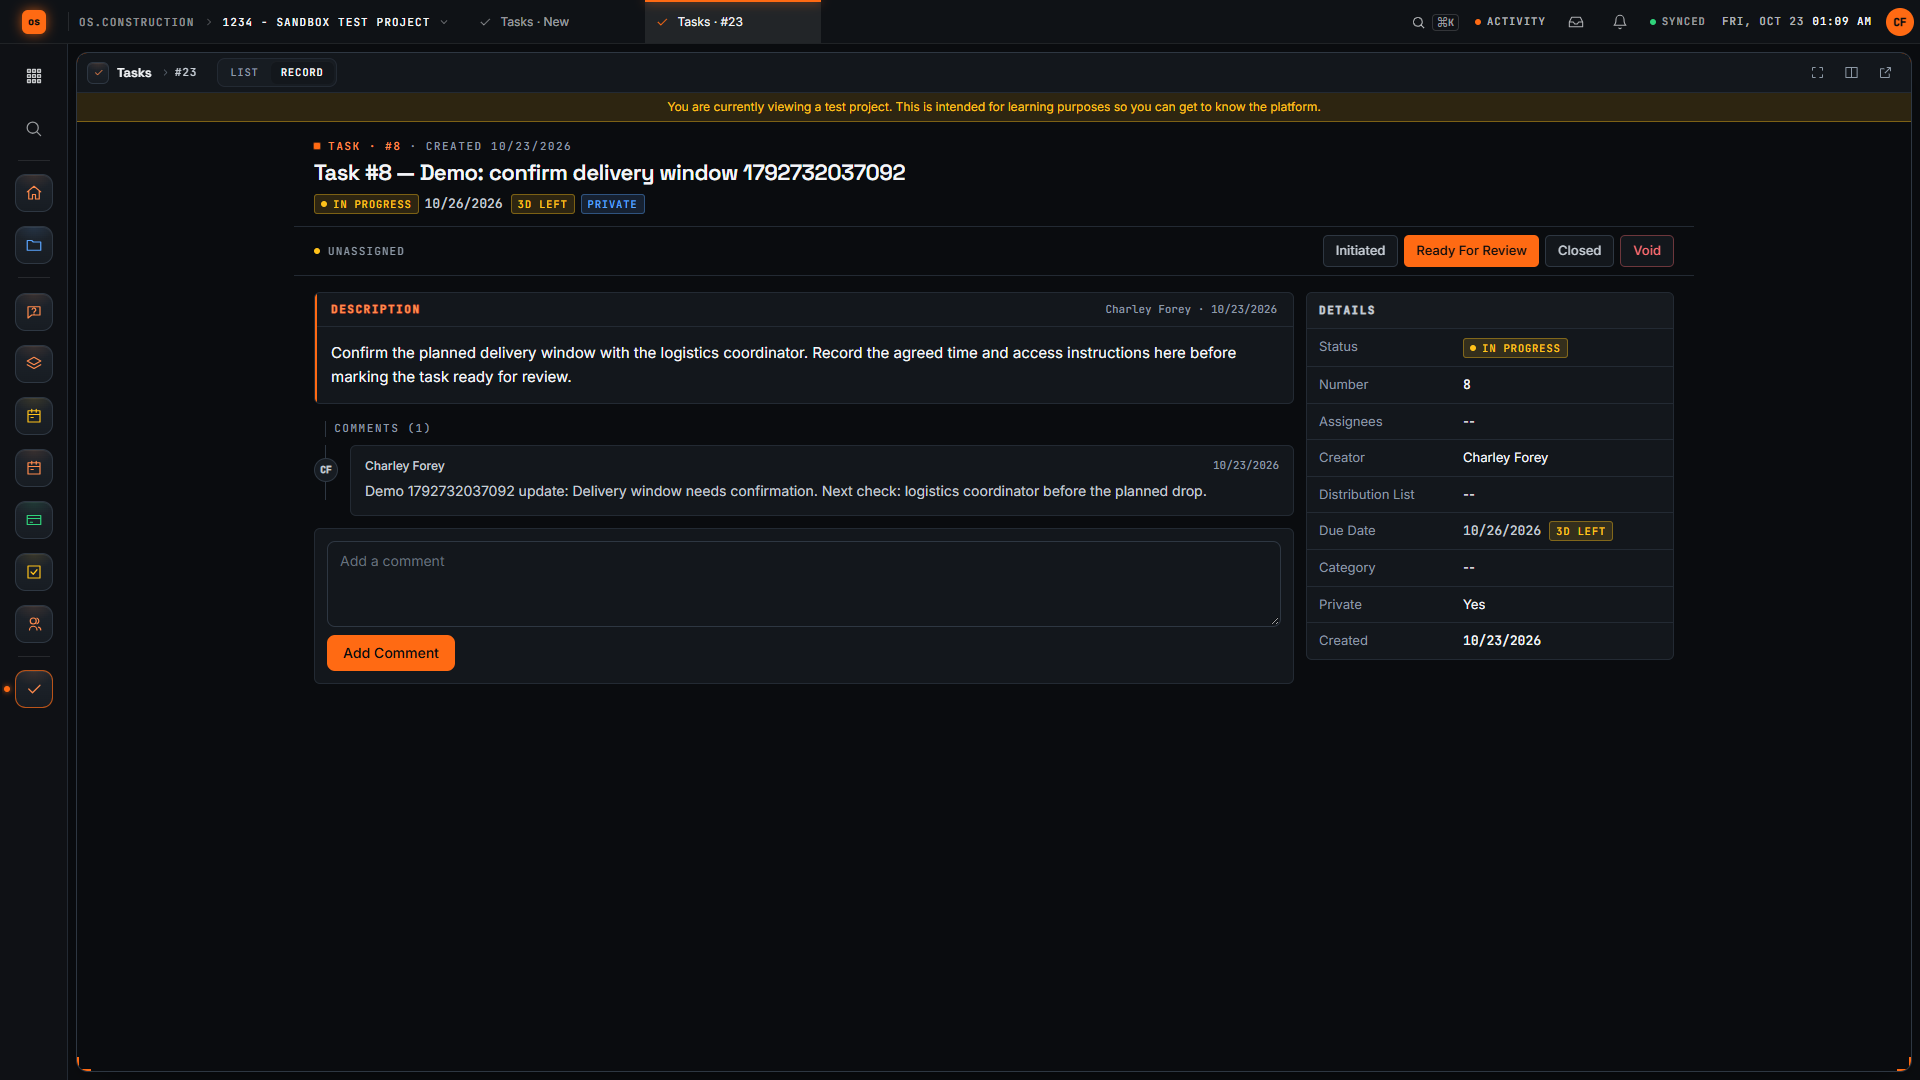
- Comments (1): the count goes up once the comment is saved.
- The saved update, with its Demo reference. Read it back to confirm it says what you intended.
- The status is unchanged. A comment adds context; it does not move the task.
Check the result before moving on
- The task names one specific follow-up.
- Its description explains what a useful result should contain.
- Its current status matches the stage you intended to record.
- The comment appears in the saved list and explains the next check.
This walkthrough stops with the task In Progress. Keep the record current as your team works through the follow-up and decides when it is ready for review or closure.
Video transcript
Start a project task
Open Create Task in the sample project. A useful task names a specific follow-up and gives the next reader enough context to understand what needs to happen. We will save this example, change its status, and add an update.
Name the follow-up clearly
Give the task an action-oriented title. Confirm delivery window tells the reader what needs attention. The unique demo reference distinguishes this sample record from other recordings.
Describe what the follow-up needs
Use Description to explain the expected result. Our invented example asks for the delivery window, the agreed time, and access instructions. Review the task’s other fields before saving. This recording leaves assignees and distribution empty.
Save the task and inspect its detail page
Select Create and wait for the task detail page. Confirm the title and description. The saved record now has a task number and a current status that the project team can use to track the follow-up.
Move the sample task into progress
For this sample, select In Progress. Check the current status in the task header after the update. A status change records the stage of the task; the delivery window itself still needs confirmation.
Write a useful progress comment
Add a comment that explains the next check. Our sample update says that the delivery window needs confirmation and identifies who to check with. This gives the reader more context than the status alone.
Save the update
Select Add Comment. Wait for the text to appear in the saved comment list. Read the saved update so you can confirm the task contains the information you intended to leave.
Review the saved progress context
Here is the saved update on the task. We have created a specific follow-up, moved its status into progress, and recorded the next check. Keep updating the record as the work changes so another reader can understand what remains.
Try a clear follow-up in your own workflow
Create an os.construction account or open the app. Start with one specific follow-up, save it, and inspect the result.
Explore the platform on os.construction, watch Construction-OS walkthroughs on YouTube, or follow os.construction on LinkedIn. For a question about your team’s coordination process, email Charley.
Your next step
Try it on the sample project.
Create an account, open the sample project and run this workflow yourself with sample data.
Try it in the app- Next · Field: daily logs & tasksCreate a punch item with an owner and locationVideo coming soon. Read the doc: Punch list: create, assign and close items
- DocsDaily logRecord each day on site in the Daily Log, copy entries from a previous day, complete and reopen a day, and export it to PDF or CSV.
- Video libraryMore in Field: daily logs & tasksEvery walkthrough, grouped by workflow.
Share this article